
在软路由系统 iStoreOS 中,安装好 Emby 后,无法直接播放存储在百度网盘等在线资源,需要通过 Alist 将网盘 WebDAV,然后再使用 Rclone 挂载到软路由本地。
Alist
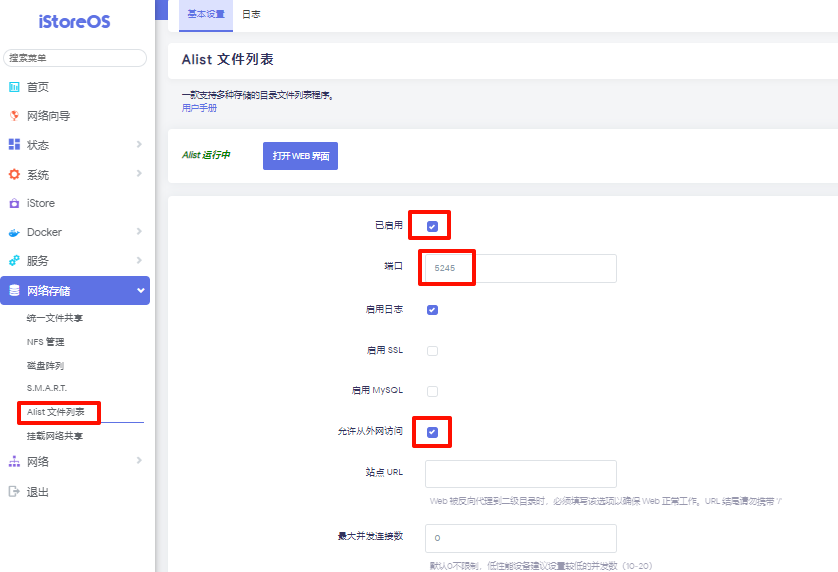
Alist 用来将各类网盘挂载为 WebDAV,在 iStore 中搜索安装即可。
注:之前在 iStoreOS 中安装的 1Panel 中安装了 Alist(Docke),始终无法使用 Rclone 挂载到软路由中,改为 iStore 中直接安装,问题解决了,奇怪呀!
Rclone
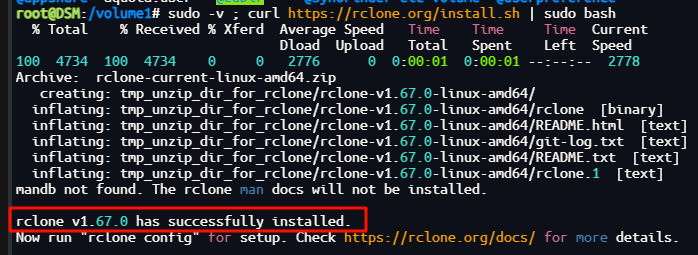
用 SSH 工具连接 iStoreOS,输入下列命令安装 Rclone。
# openwrt安装,新版的rclone依赖fuse3,所系需要安装(尽管rclone的子依赖包含fuse但那是旧版本)
opkg update
opkg install fuse3-utils rclone
Rclone 设置
要将 alist 挂载到本地,先要设置 rclone remote,rclone文档 说的比较清晰,可以跟着以下命令进行操作:
1. # 进入rclone设置
2. rclone config

4. # 选择新远程
5. No remotes found, make a new one?
6. n) New remote
7. s) Set configuration password
8. q) Quit config
9. n/s/q> n #这里选择n

11. # 设置名字
12. name> remote
13. Type of storage to configure.
14. Choose a number from below, or type in your own value`
15. [snip]
16. XX / WebDAV
17. \ "webdav"
18. [snip]
19. Storage> webdav  `#这里输入远程的名字,之后就是你的远程名称

21. `# 设置远程地址url http://your_alist_ip:port/dav
22. URL of http host to connect to
23. Choose a number from below, or type in your own value
24. 1 / Connect to example.com
25. \ "https://example.com"
26. url> http://192.168.3.3:5245/dav
27. # 这里设置alist的地址和端口,后面要带dav,这是alist要求的

28. `# 这里选6就可以了,1-5都不是我们使用的
29. Name of the WebDAV site/service/software you are using
30. Choose a number from below, or type in your own value

41. 6 / Other site/service or software
42. \ (other)
43. vendor> 6

44. # 设置远程账号
45. User name
46. user> admin #这里是你alist的密码

47. # 设置远程密码
48. Password.
49. y) Yes type in my own password
50. g) Generate random password`
51. n) No leave this optional password blank
52. y/g/n> y `#这里输入y
53. Enter the password: #这输入你的密码,密码是看不到的
54. password:
55. Confirm the password: #再次输入你的密码
56. password:

57. # 这里直接回车即可
58. Bearer token instead of user/pass (e.g. a Macaroon)
59. bearer_token>
60. Remote config

61. # 这里可能会问你是默认还是高级,选择默认即可`

71. # 确认
72. y) Yes this is OK
73. e) Edit this remote
74. d) Delete this remote
75. y/e/d> y #输入y即可

76. # 最后按q退出设置
Rclone 几个有用的命令:
# 查看配置文件
rclone config show
# 列出挂载文件的目录,这里baidu是上面配置的名称
rclone lsd baidu:/
Rclone 临时挂载
新建相关文件夹。
mkdir /mnt/sata1-1/webdav  # baidu的webdav挂载地址
chmod 777 /mnt/sata1-1/webdav  # 修改文件夹权限
mkdir /mnt/sata1-1/tabor/tmp/alist #缓存文件夹
chmod 777 /mnt/sata1-1/tabor/tmp/alist # 修改文件夹权限
不推荐使用临时挂载,正常使用推荐进行持久化挂载,临时挂载的命令:
rclone mount baidu: /mnt/sata1-1/webdav --vfs-cache-mode writes --copy-links --no-gzip-encoding --no-check-certificate --allow-other --allow-non-empty --umask 000 --use-mmap
参数解释:
用于将 baidu: 远程挂载到本地目录 /mnt/sata1-1/webdav。以下是一些可能的优化建议和说明:
-
使用
--vfs-cache-mode参数:-
--vfs-cache-mode writes:建议用于大多数情况,特别是需要写入支持的远程存储。 - 如果需要更强大的缓存功能,可以考虑使用
--vfs-cache-mode full,它会缓存整个文件,但可能会占用更多的磁盘空间。
-
-
选项解释:
-
--copy-links:复制符号链接的内容而不是链接本身。 -
--no-gzip-encoding:禁用 gzip 压缩。 -
--no-check-certificate:不检查服务器的 SSL 证书。 -
--allow-other:允许其他用户访问挂载点。 -
--allow-non-empty:允许挂载点非空挂载。 -
--umask 000:设置挂载点的 umask 为 000,即文件和目录的默认权限为最大化权限。 -
--use-mmap:使用内存映射文件。
-
Rclone 持久挂载
方法一:
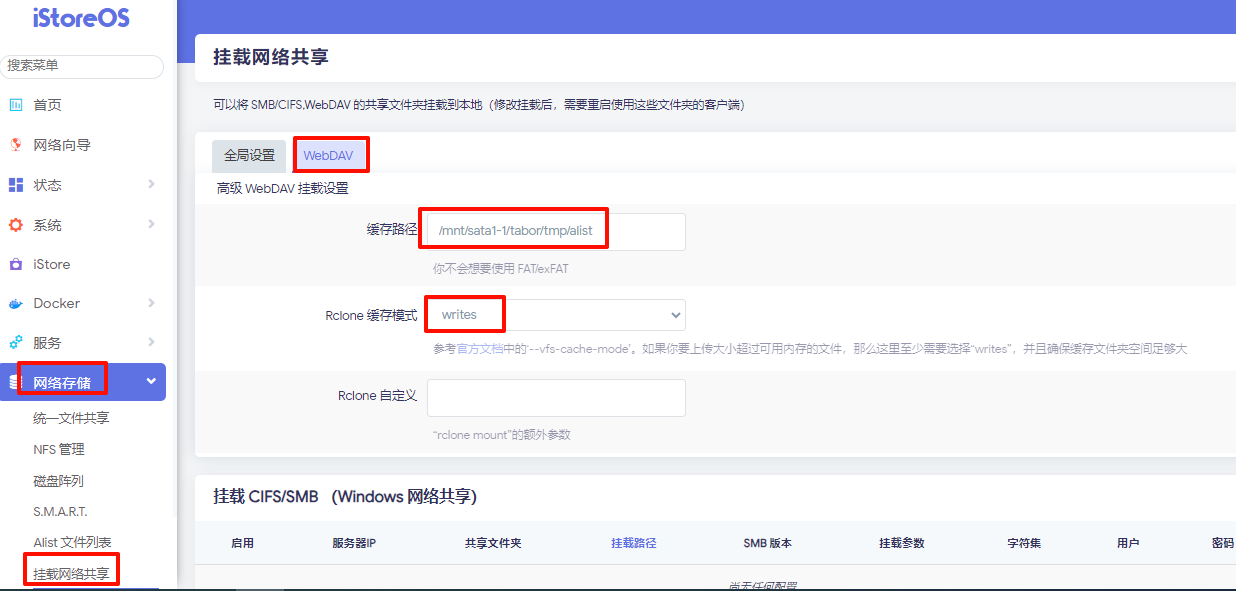
安装 Rclone 后,直接在网络存储 - 挂载网络共享中,设置参数后,实现自动挂载。
- 全局设置中,点击启用;在 WebDAV 设置中,设置缓存路径、Rclone 缓存模式建议设置为 writes。
- 输入 URL、挂载路径、引擎选择 Rclone、挂载参数选择可读写、输入 alist 的用户名和密码。
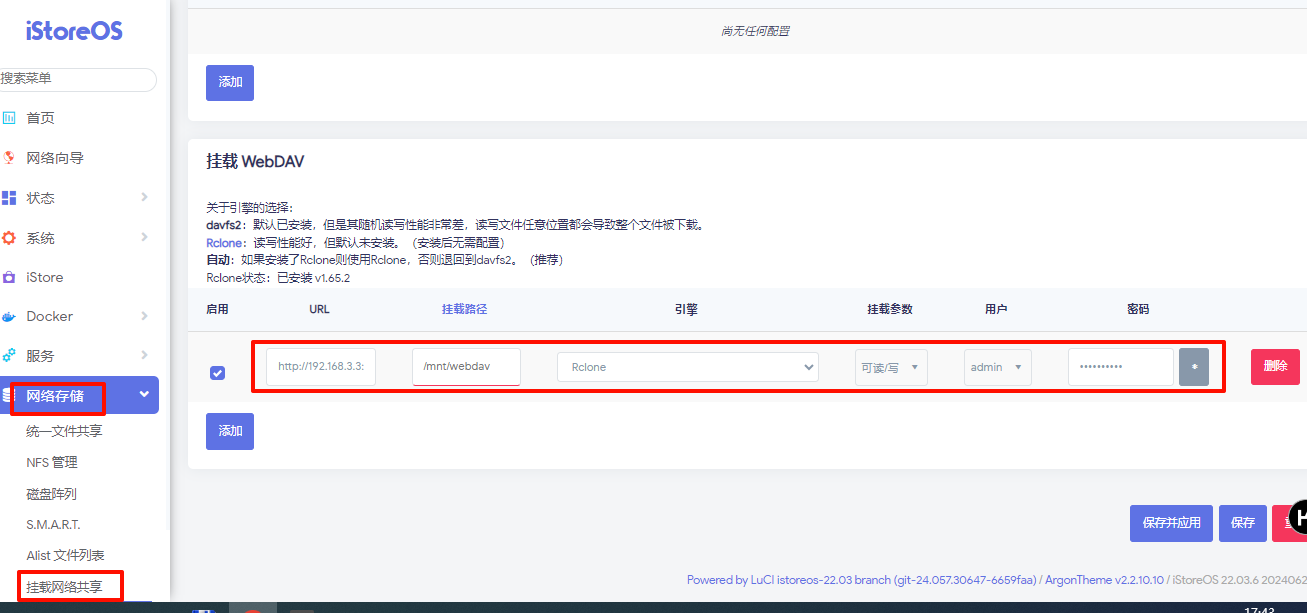
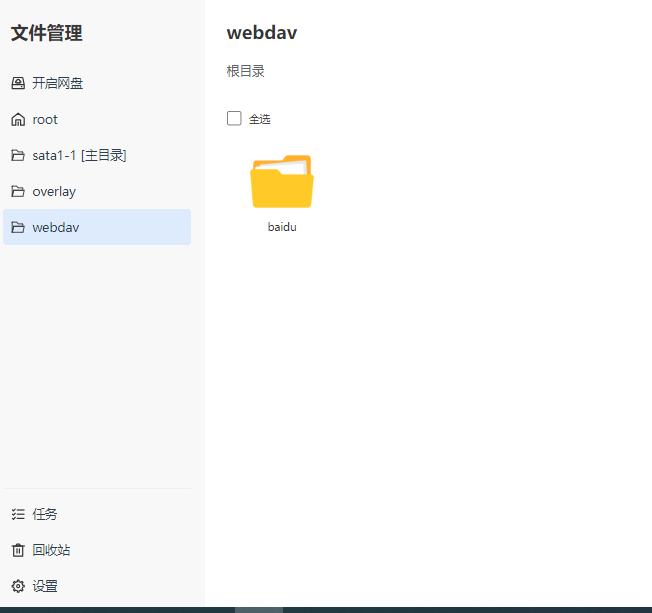
- 点击保存应用,就完成了 Rclone 持久挂载。在服务 - 易有云文件管理器 - 本地文件管理,就可以看到挂载的 webdav 了。
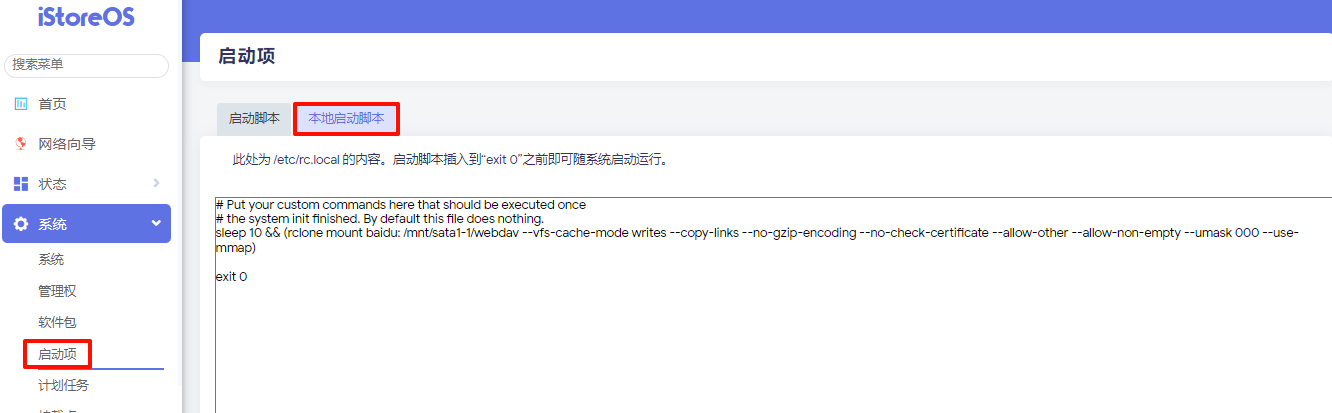
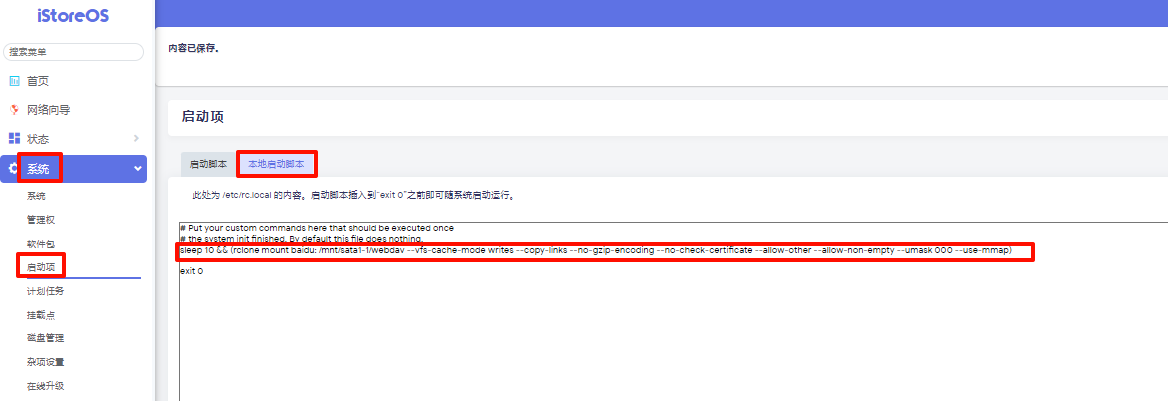
方法二:
将下列命令,复制到 iStoreOS 中系统 - 启动项 - 本地启动脚步中,即可实现开机自动挂载,与方法一使用一种就可以。
sleep 10 && (rclone mount baidu: /mnt/sata1-1/webdav --vfs-cache-mode writes --copy-links --no-gzip-encoding --no-check-certificate --allow-other --allow-non-empty --umask 000 --use-mmap)


评论